Salt Mask Weathering
The first step in the process was to paint the model a dark rust colour, for which I used TAMIYA Red Brown. Once the paint had dried, sea salt was applied to the deck to form a mask. Sea salt is important as it has randomly sized and shaped grains; however, straight out of the packet it is far too coarse for N scale.
To address this, the salt was passed through a kitchen sieve with 1 mm mesh openings, and the finer sieved salt was used to create the mask. If the salt has absorbed moisture it can clump together, but this can be rectified by briefly placing it in a microwave oven to dry it out.
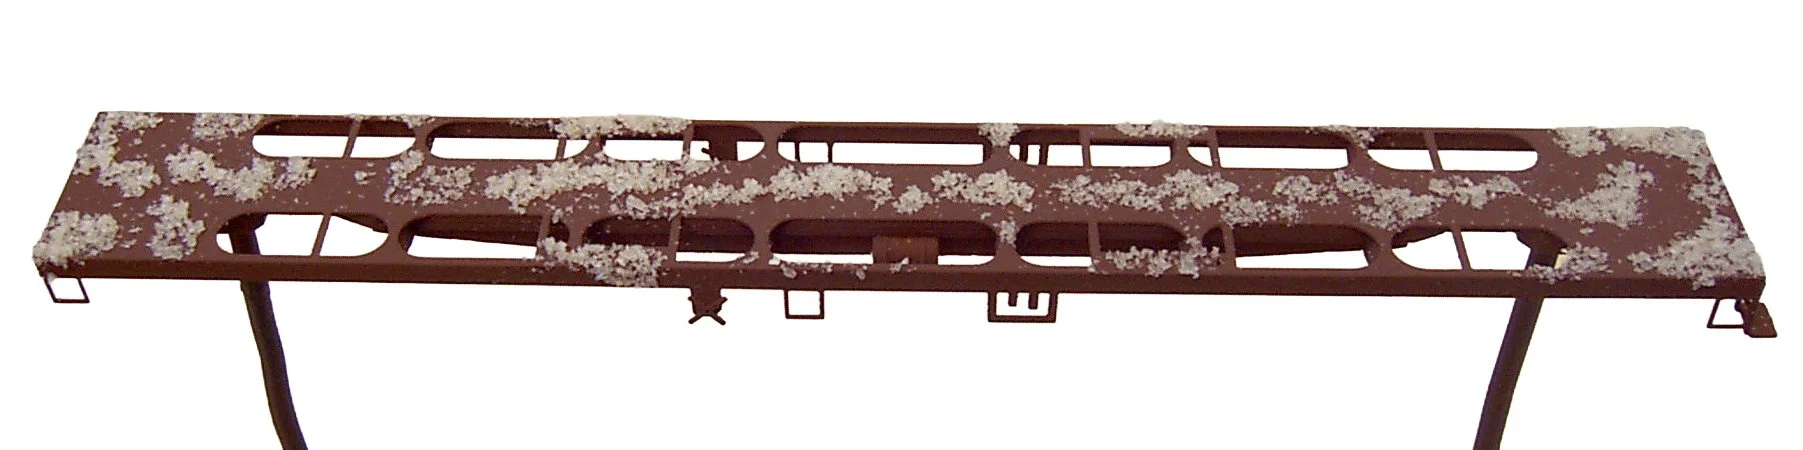
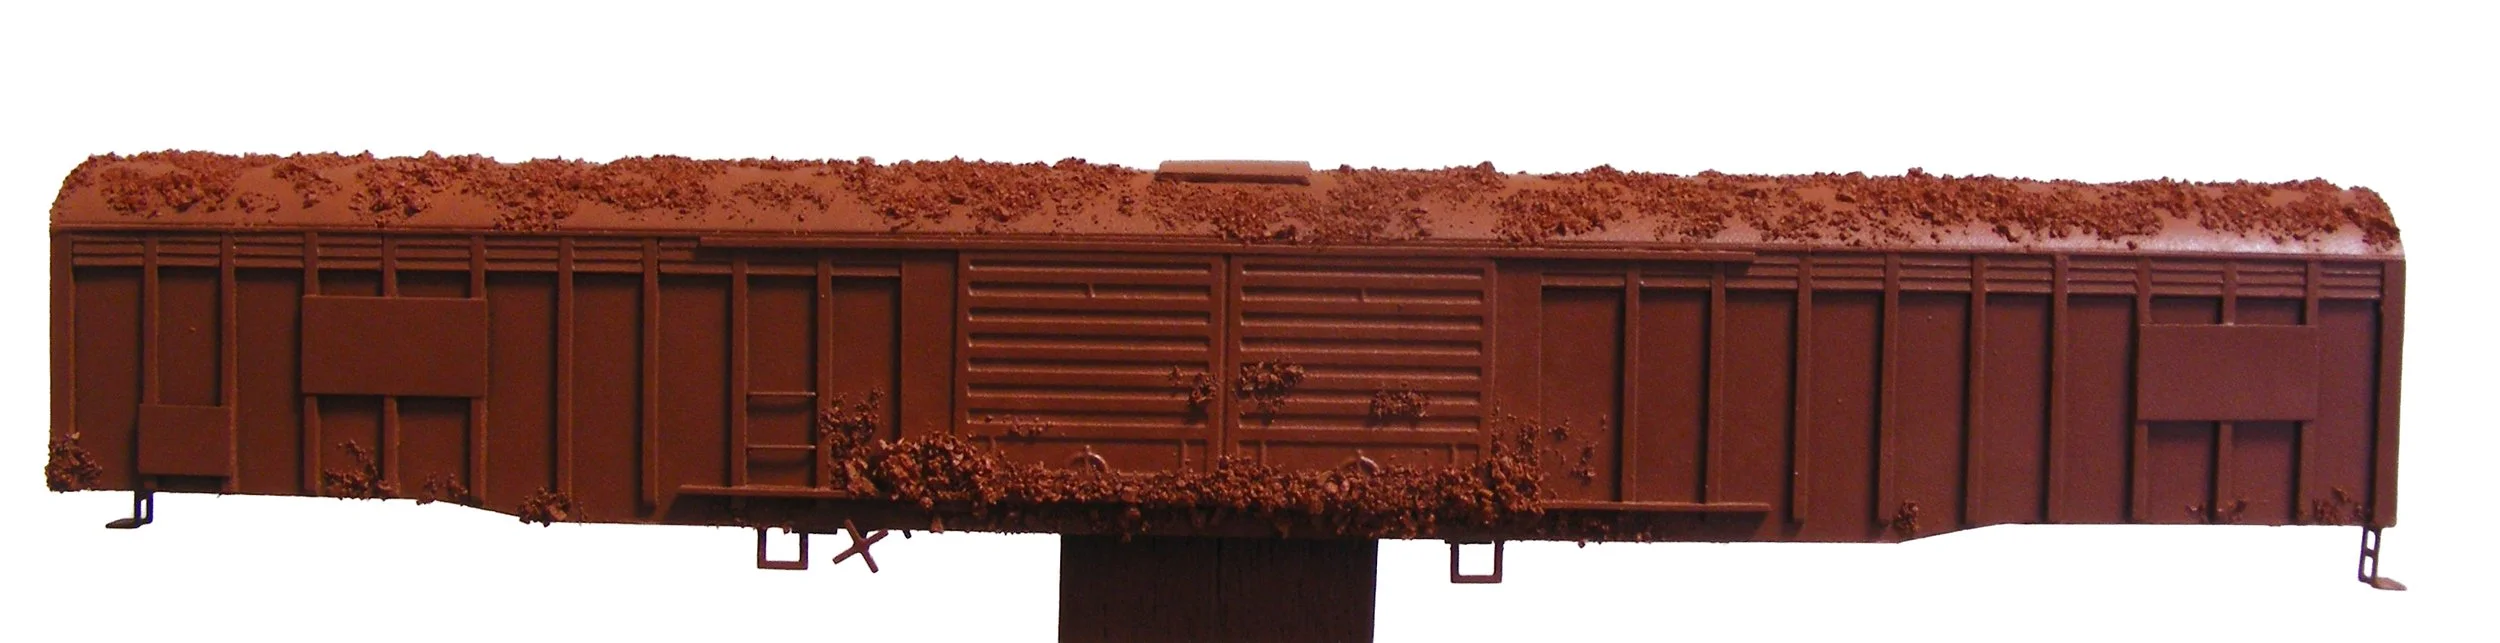
Salt laid down over the previously painted surface is. Photo: John Miller
To apply the salt, the model surface was thoroughly wetted with water and the salt sprinkled on to form a random pattern. Once the water evaporated, the salt remained adhered to the model. For improved adhesion, saliva can be substituted for water; the choice is yours, but for the record I used spit (see main photo).
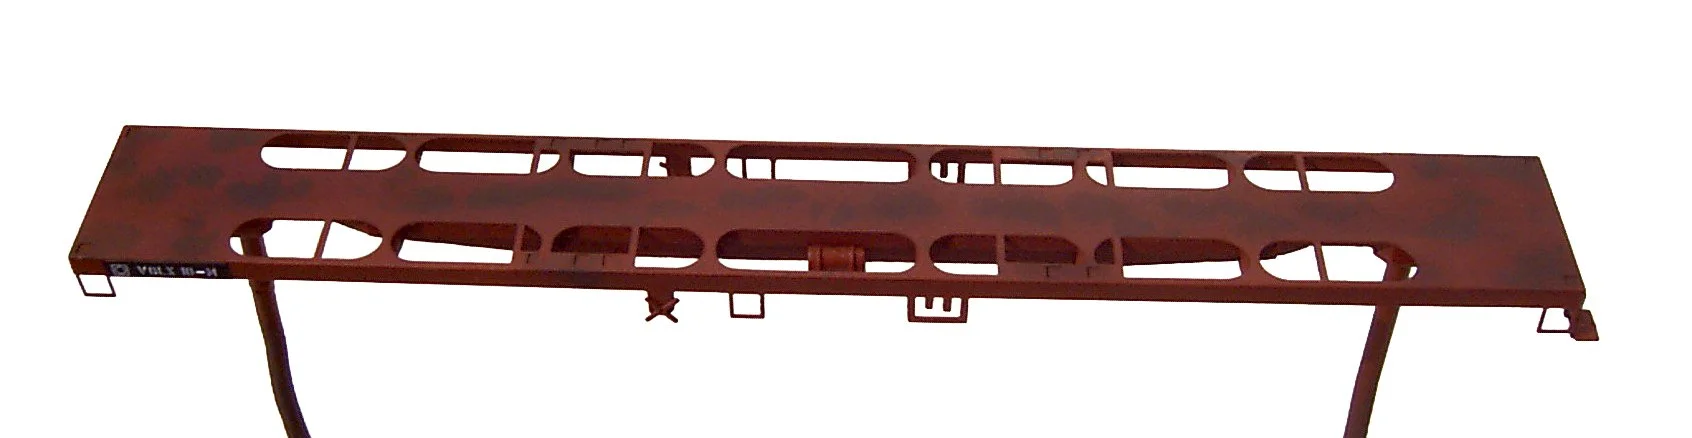
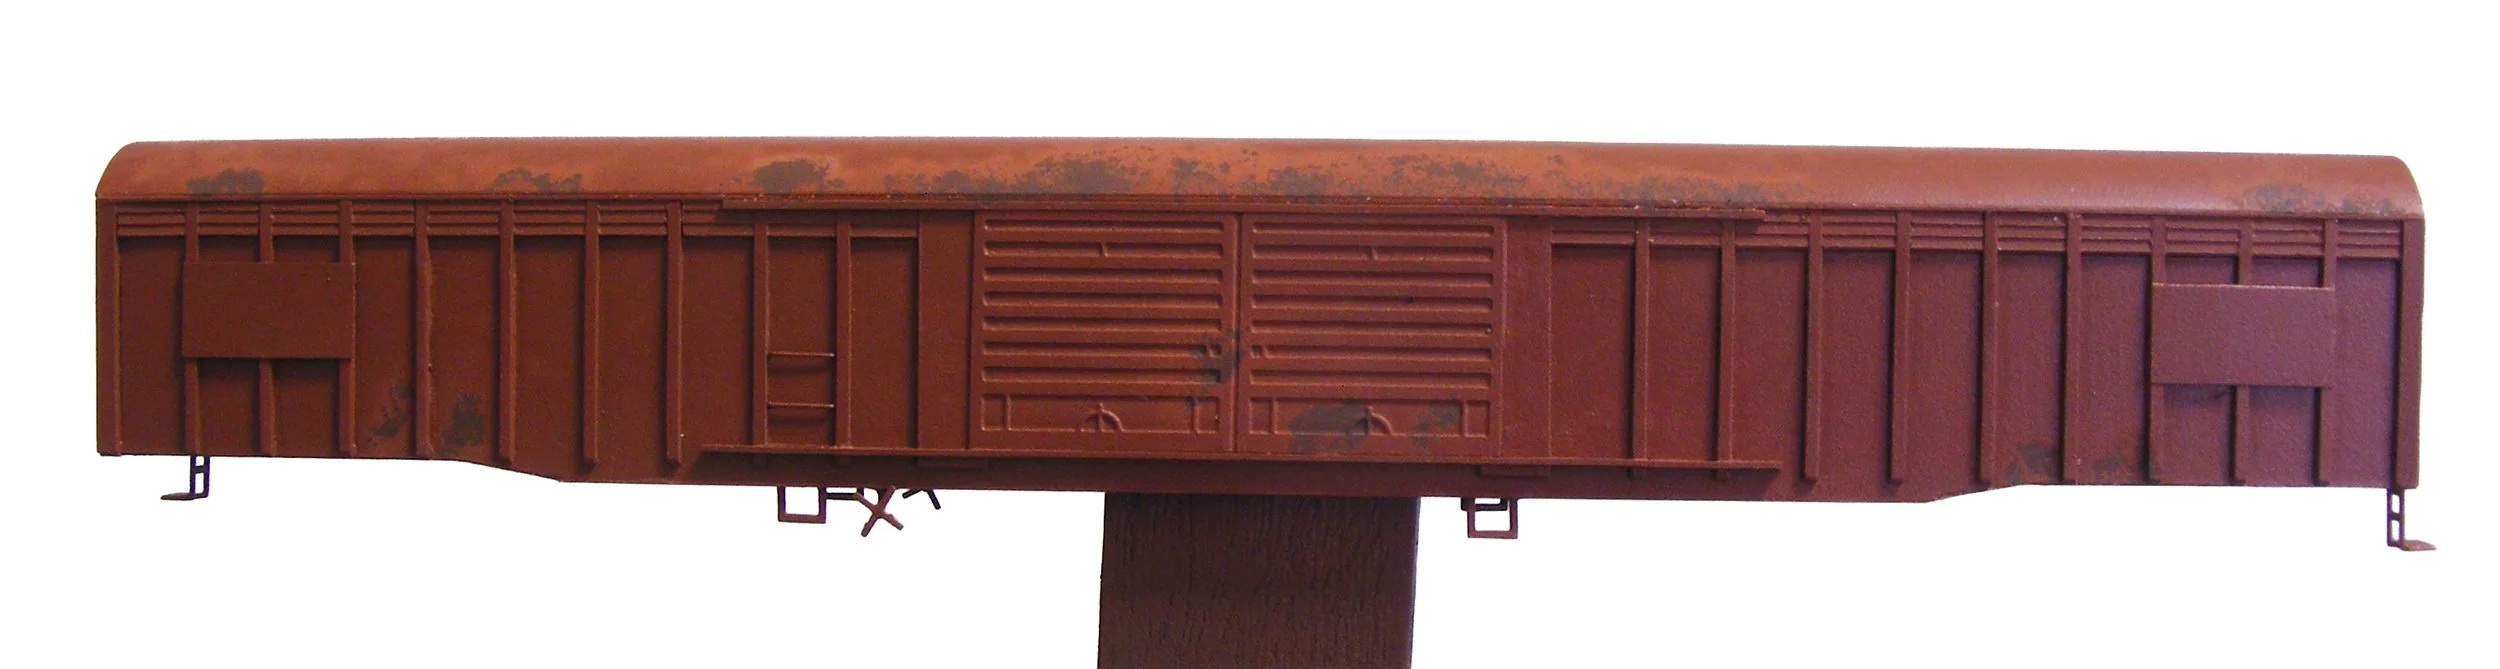
Shows the salt removed and prior to any further subtle weathering. Photo: John Miller
The next step was to paint the model the correct colour, in this case MODELFLEX Light Tuscan Oxide Red. This is where I initially went wrong, as I painted the model using my usual airbrushing technique. This resulted in approximately half of the salt mask being blasted off the model by the paint stream.
Once the top coat had dried, the salt was removed with a clean, dry brush to reveal the rust effect beneath. Unfortunately, the first attempt produced random blobs of rust rather than the subtle effect I had been hoping for. It was clear that the airbrush needed to be held further away from the model and that even lighter coats of paint were required.
A second attempt was made by repainting the deck with Red Brown and applying another salt mask. This time, the top coat was sprayed from a greater distance. The result was far more satisfactory, with two notable improvements: the salt mask remained in place, and the paint partially dried before reaching the model surface. This introduced a subtle texture which further enhanced the rusty appearance of the deck.
After removing the salt mask, a shiny residue can remain on the surface. This was washed off with water and a cotton bud prior to any further weathering. Once dry, the model was airbrushed with Dullcote, followed by a brushed-on wash consisting of five parts water to one part TAMIYA Red Brown, applied evenly across the deck.

When the wash had dried, most of it was removed from the painted areas using a soft plastic eraser, after which another coat of the wash was applied over the entire deck. Final weathering was achieved using multiple light airbrushed coats of earth wash over the entire wagon, with heavier build-up concentrated on the underframe and end sills where dirt is thrown up from the wheels. Once the desired effect was achieved, the weathering was sealed with a final spray of Dullcote.
The bogies were painted Light Tuscan Oxide Red and weathered using Burnt Umber and Dark Grey pastels, followed by an earth wash and Dullcote. The couplers received my standard treatment, consisting of MODELFLEX Harbour Mist Grey on the trip pins and a dry-brushed application of TAMIYA Red Brown on the knuckles.

Originally published in the Victorian N Scale Collective Newsletter