Tissue paper Tarpaulins
I often try to think of ideas to complement rollingstock on the cheap. We don’t all have endless cashflow, and the most satisfaction is often achieved by using your own two hands to build something. Some Aust-N-Rail ELX wagons for a steel train were finished by adding tarps. The beauty of this project is that it is very cheap and very satisfying.
Hopefully there are a few tips here that can be used for other projects, so read along and see what ideas might be useful.
Materials
Photos: Jamie Winderlich
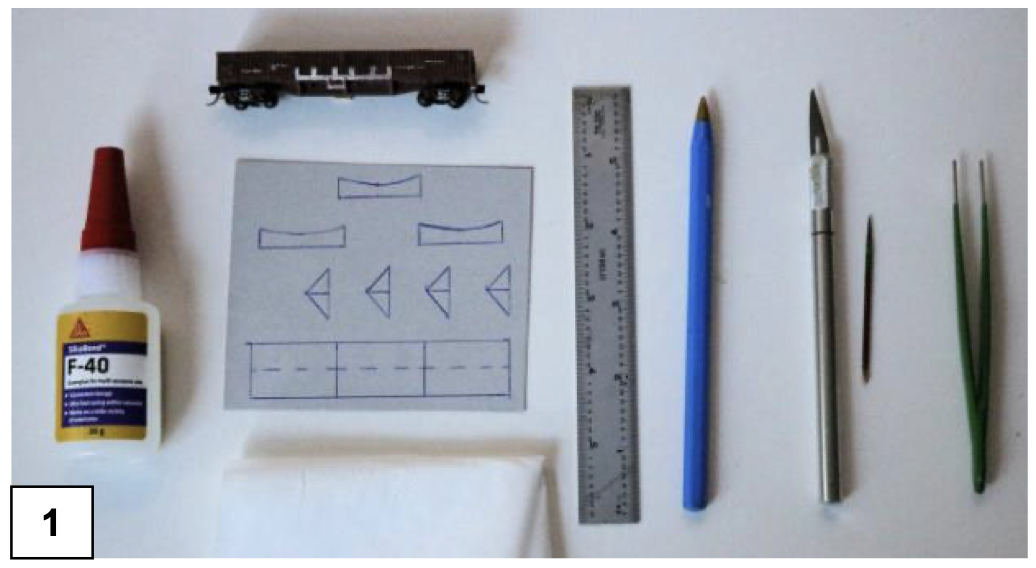
The items needed are shown in [1]—not much at all:
The wagon (of course!)
Supa-Glue
Tissue paper
Cardboard (from a Weet-Bix box)
Ruler
Pen
Scalpel
Toothpick
Tweezers
Building the tarp former
Photo [2] shows all the cardboard pieces cut out. These consist of:
The outside of the wagon top: 88 × 19.5 mm
Four triangles to represent the tarp poles: 19.5 × 5 mm
Ridge pole supports with a slight curve to represent the sag of the tarp
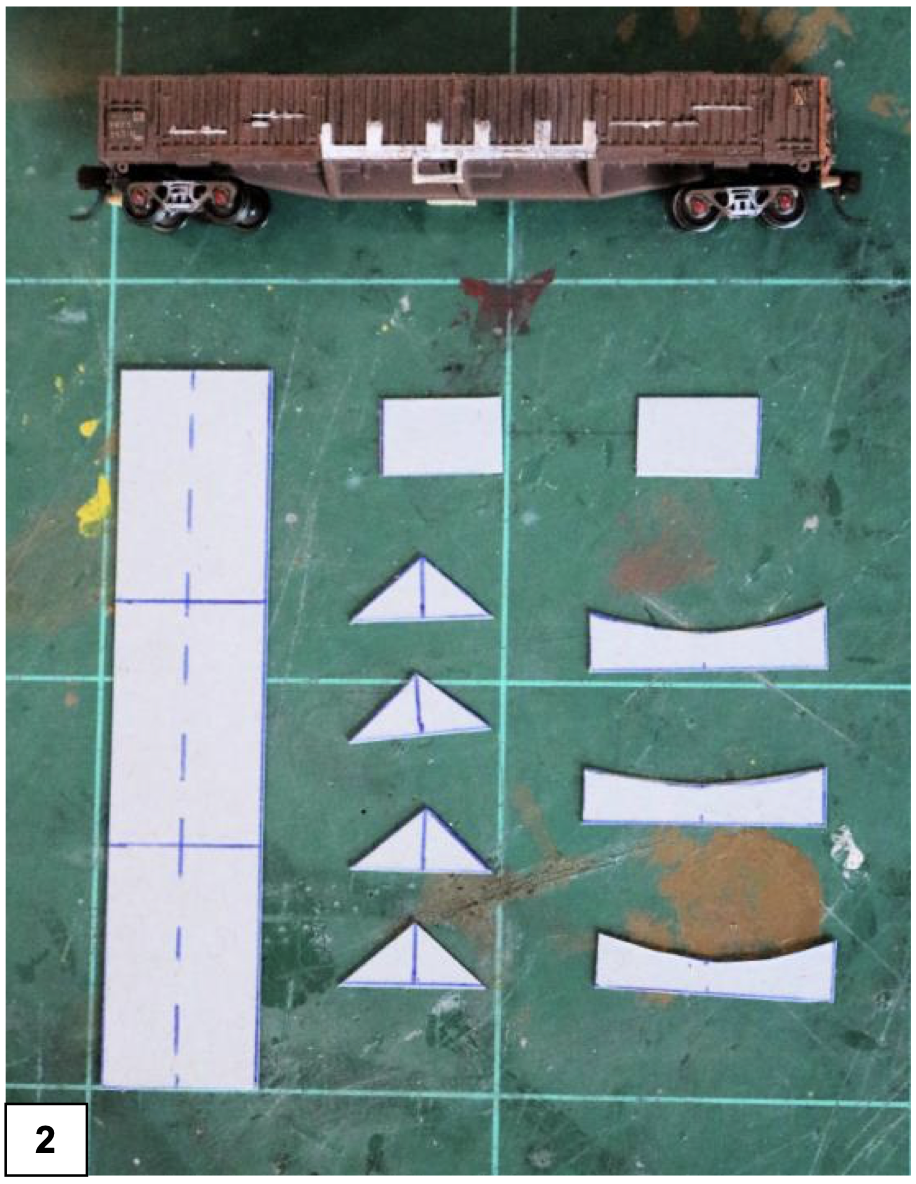
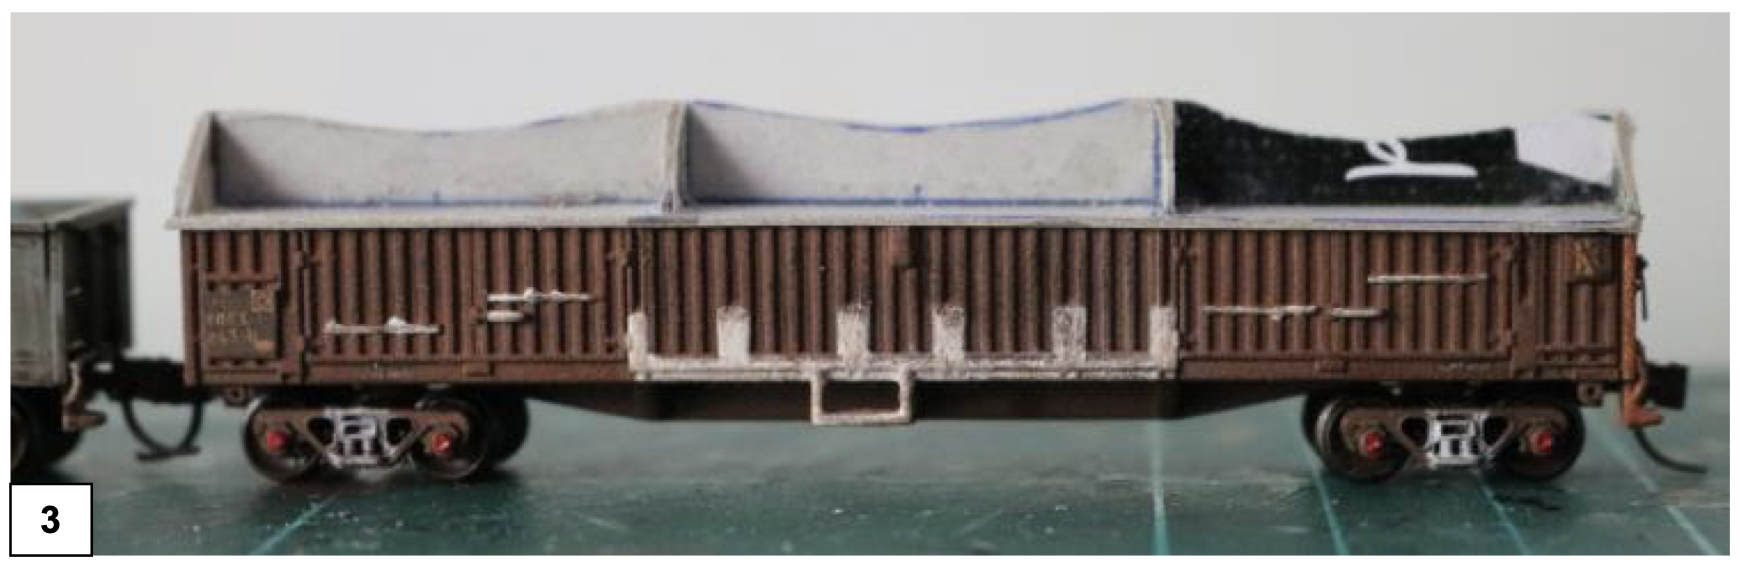
Glue all of these together so they resemble [3].
A piece of cardboard slightly smaller than the inside dimensions of the wagon is also cut and glued to the bottom of the former. This acts as a locator inside the wagon and makes positioning the tarp former much easier.
The whole arrangement sits at the height of the gunwhale (top edge) of the original Aust-N-Rail wagon, as shown in [3]. To achieve this, sand down the thickness of the cardboard on the top of the wagon being tarped. If this step is skipped, the tarp will sit too high. Once complete, glue the tarp former onto the top of the wagon.
Applying the tarp
Now for the fun (or patience-testing) part: sticking the tarp down. This stage may take a few sittings.
First, cut the tissue paper to size—approximately 108 × 34 mm. Use only one ply of the tissue paper. Lay it over the tarp former, centred, and begin gluing it down.
The best method is to carefully hold the edges of the tissue against the former and wagon body, then drip Supa-Glue along the centre ridge of the tarp former. This may take a few minutes to fully set, so allow it to rest before continuing.
Once set, begin gluing down the rest of the tarp. Carefully pull one side of the tissue down at a time and drip glue from the top down. By this stage, it should bond well with the cardboard former.
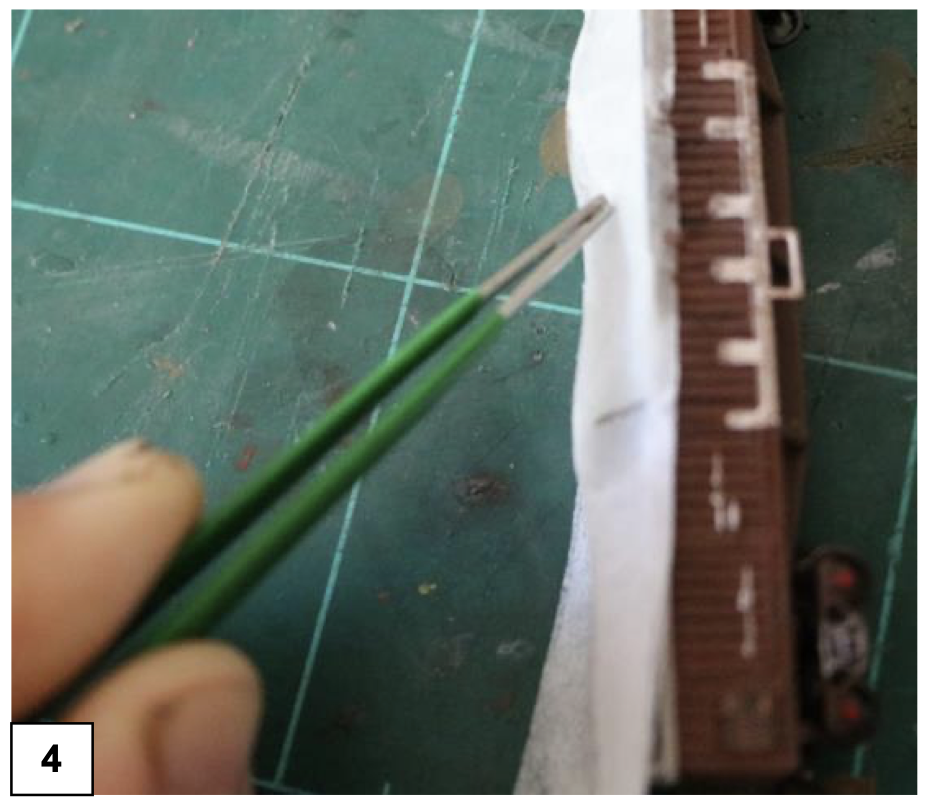
After both sides are glued and have set for a few minutes, the tarp can be given its final shape. Using the blunt end of a toothpick or rounded tweezers, gently roll over the tissue between the formers [4]. The glue will not yet be fully rigid, allowing the tissue to be pushed down to create a natural, draped appearance. When satisfied with the shape, drip a little more glue over the top—but not too much.
Finishing the edges
The edges of the tissue paper now need to be attached to the sides of the wagon. If enough glue has been used, the tissue should be fairly stiff and easy to work with. Simply crease it down over the sides and sparingly drip glue so it bonds to the wagon body.
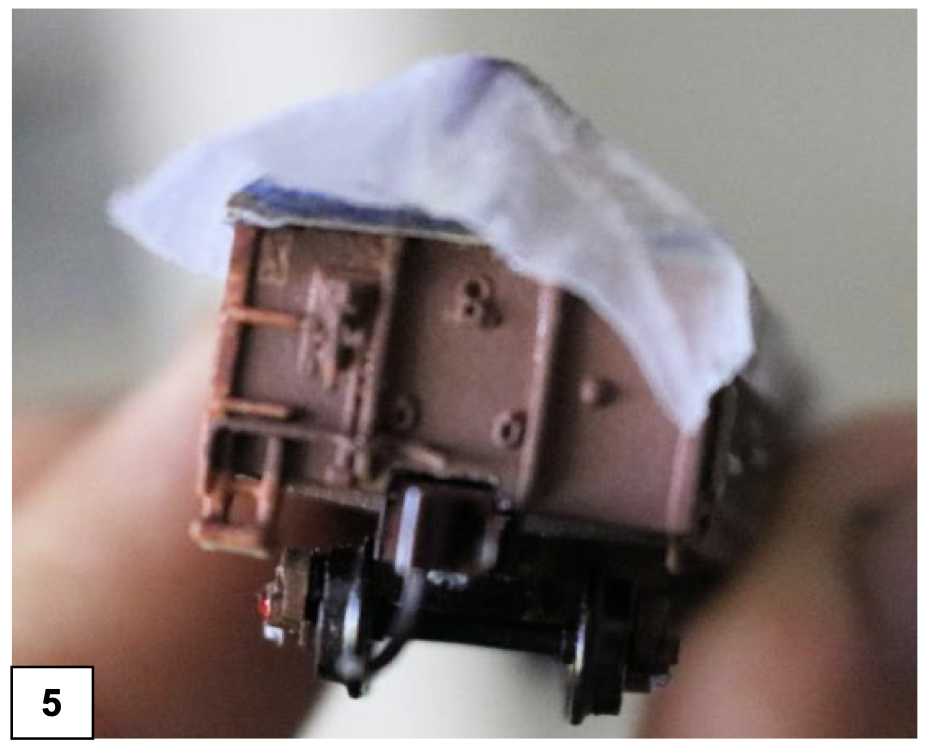
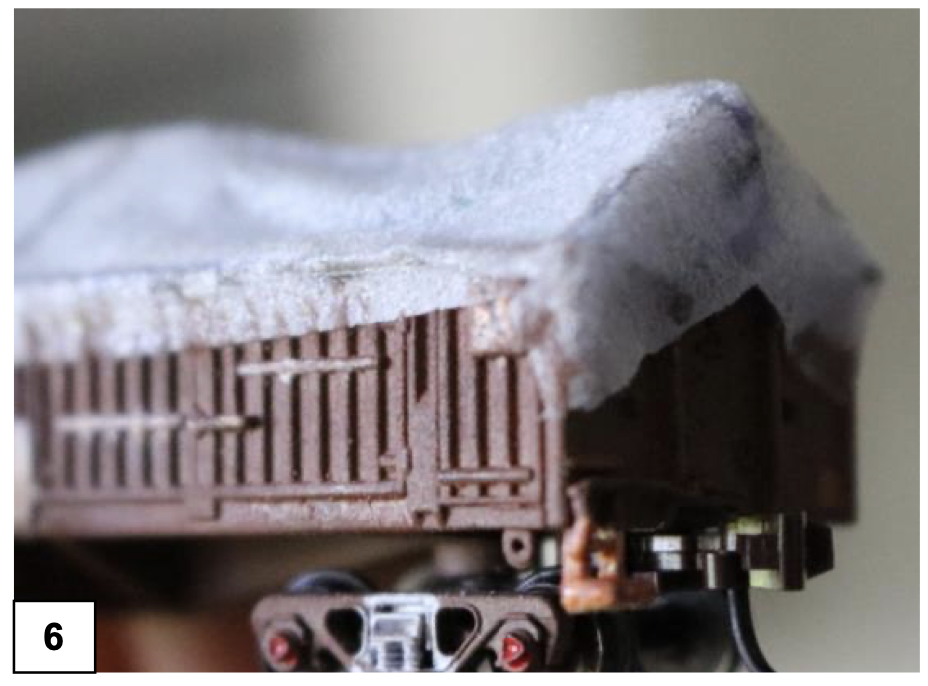
The ends are completed last, as they are the final points tied down on a real tarp. If the tissue was sized correctly, it should hang over the wagon ends by about 8 mm. Fold this down one side at a time and glue it to the wagon end [5]. A small triangle of tissue may remain that won’t fold neatly—this should be wrapped around the side as shown in [6].
Once complete, drip one final light coat of glue over the top and allow it to fully set. This will result in a very rigid tarp.
Painting and weathering
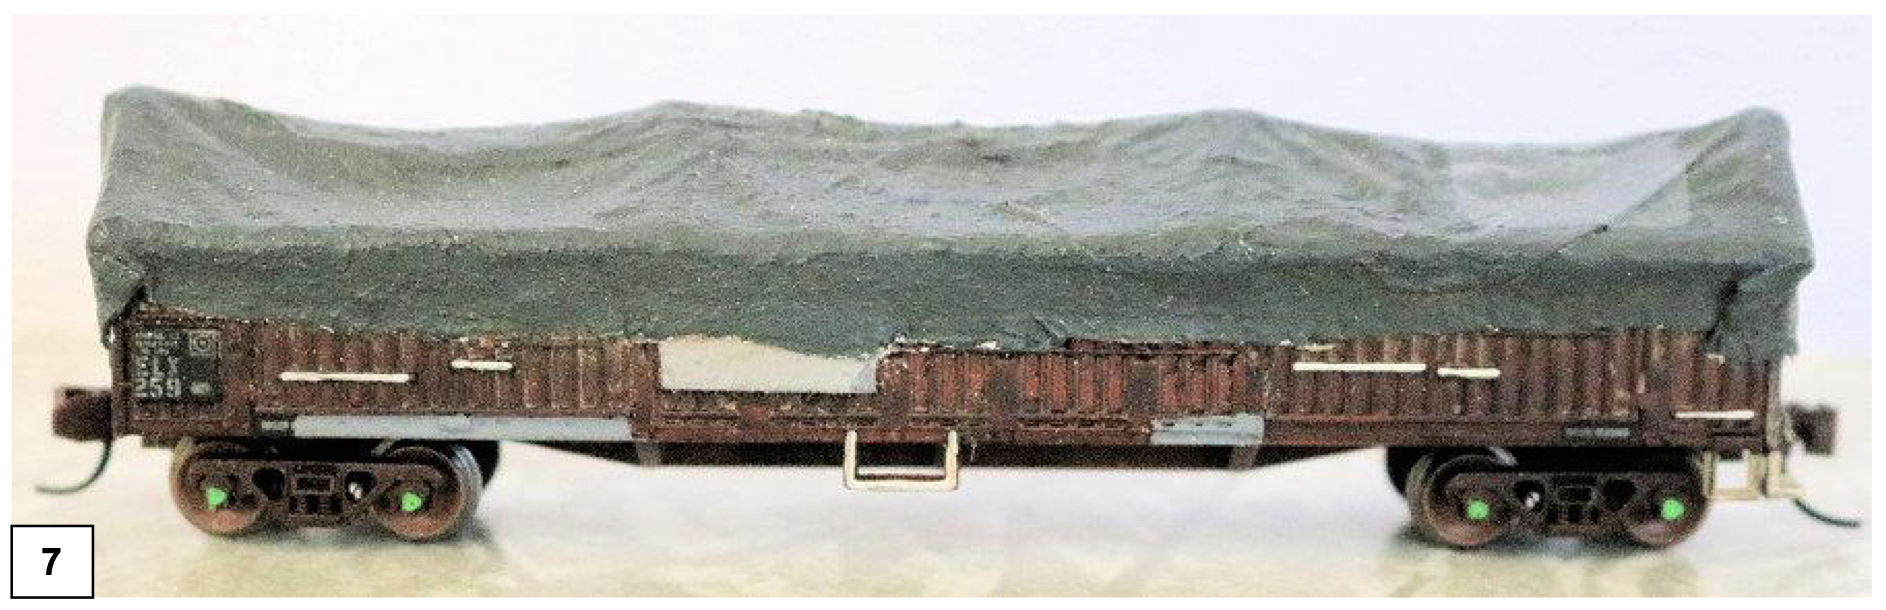
The final step is to paint and weather the tarp. Use preferred paints and refer to prototype photos for inspiration [7].
As always, go easy with the Supa-Glue to avoid sticking fingers together, and work in a well-ventilated area—those fumes can be overwhelming otherwise!
Originally published in the Victorian N Scale Collective Newsletter